
The Basement: Bathroom Beadboard Paneling
Slowly but surely, the basement is getting finished. We're wrapping up the
basement bathroom and I wanted to show you the beadboard treatment.
Beadboard Paneling
Beadboard is a popular choice for bathrooms because it's durable, can be
painted any colour, and looks just as good in rustic as in more contemporary
spaces. I like beadboard because it adds texture and interest - though it
might not be as interesting as the Van Gogh mural we had in the bathroom
before we started renovations:

Moving on. To get the clean, fresh look I craved in this small bathroom, I knew
beadboard was the way to go.

THIS PROJECT SPONSORED BY THE HOME DEPOT CANADA. Thank you for your support of me and the sponsors who make this blog possible!
We researched our options extensively. What is beadboard? Beadboard is a
lightweight MDF product. It can be installed right on top of drywall.
There are so many different varieties of beadboard: thick or thin
planks, wainscot (3') height or full height, individual planks or
ready-to-install panels.
To keep costs down, we went with the beadboard panel. We wanted to take the
beadboard higher, 2/3rds up the wall, so we used the
Portside 2" Beaded Panelling
from The Home Depot.

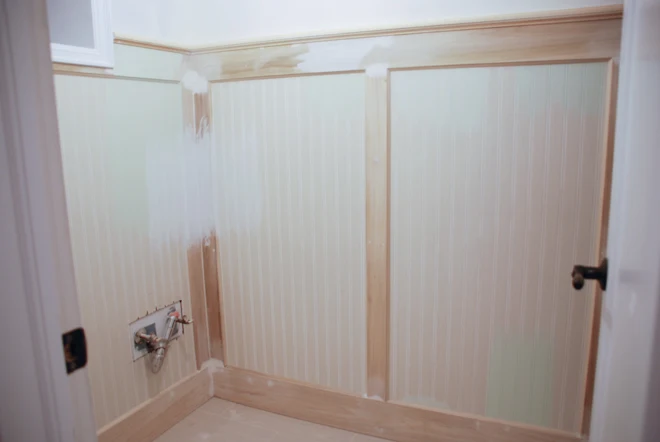
Here it is installed. You can see I couldn't resist testing out some paint
colours :) With beadboard panels, you need to plan out the seams as the panels
are typically 4' wide and your walls are often wider. We had one seam so we
(and by we I mean HandyMan) cut down the panel so the seam fell in the middle
of the wall. The seam wouldn't be noticeable once we filled the gap with Dap
and painted.
You also need to consider how to finish off the beadboard. Unlike tongue and
groove panels which fit nicely together, the edges of the beadboard sheet are
rough and uneven.


How To Scribe To The Floor
To hide the bottom edge, we wanted a substantial 5" baseboard. The floor was a
bit uneven so HandyMan had to scribe the wood. He did that by running a pencil
along the floor perpendicular to the wood, and scribing a line onto the wood.
The pencil mark mimics the angle of the floor and by cutting along that line,
you get a nice tight fit.


Moulding And Beadboard
We hid the top edge with a similar flat piece of wood. We planned it so that
the thermostat for in-floor heating (which was already installed in the wall)
fell squarely on this piece.
Just like we did
with the sconces in our master bedroom, we built out the trim around the thermostat for a more custom, professional
look. With trim, the key is to keep proportion and balance in mind. You don't
want trim to look too skimpy or too oversized.
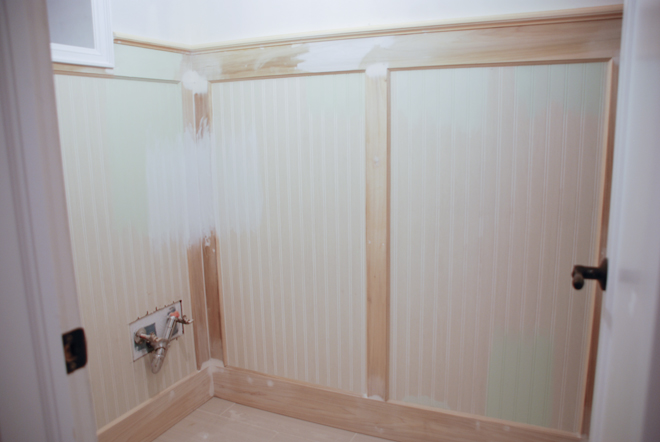
After adding top cap moulding and some smaller interior trim, things look much more finished:

More progress to come!
After adding top cap moulding and some smaller interior trim, things look much more finished:

More progress to come!


0 comments