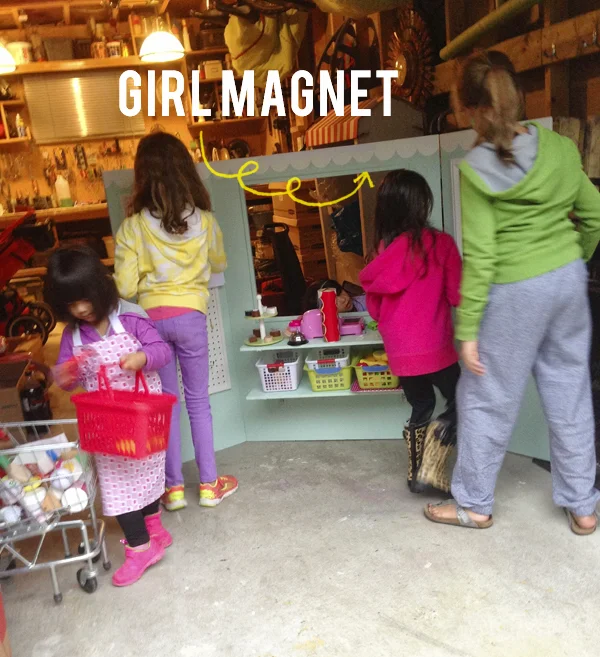
DIY Make Believe Station from Plywood
I realize its a little late in the season to be building outside, but I never got around to sharing instructions on how we built Chloe's Make Believe Station.
Here's the directions for the basic structure of the make believe station. I did film a video of how we put this together for CityLine which has been delayed in airing so unfortunately I don't have any in-progress pics! All materials were purchased at The Home Depot.
How to Make a Plywood Make Believe Station
Materials:
- 1/2"x48"x96" Hardwood Plywood Veneer Core - Birch- 2 packages of 11"x5" Folding Shelf Brackets by Stanley
- 6 - 2.5"x2.5" Broad Hinges by Stanley
- 24"x48" sheet of pegboard
- D4S 5/16" x 11/16" pine trim
- Outside Corner Pine trim
- 14"x23" Classic Moulding Panel by Simpl
- Latex paint
- Chalkboard paint
- Carpenter's glue
Directions:
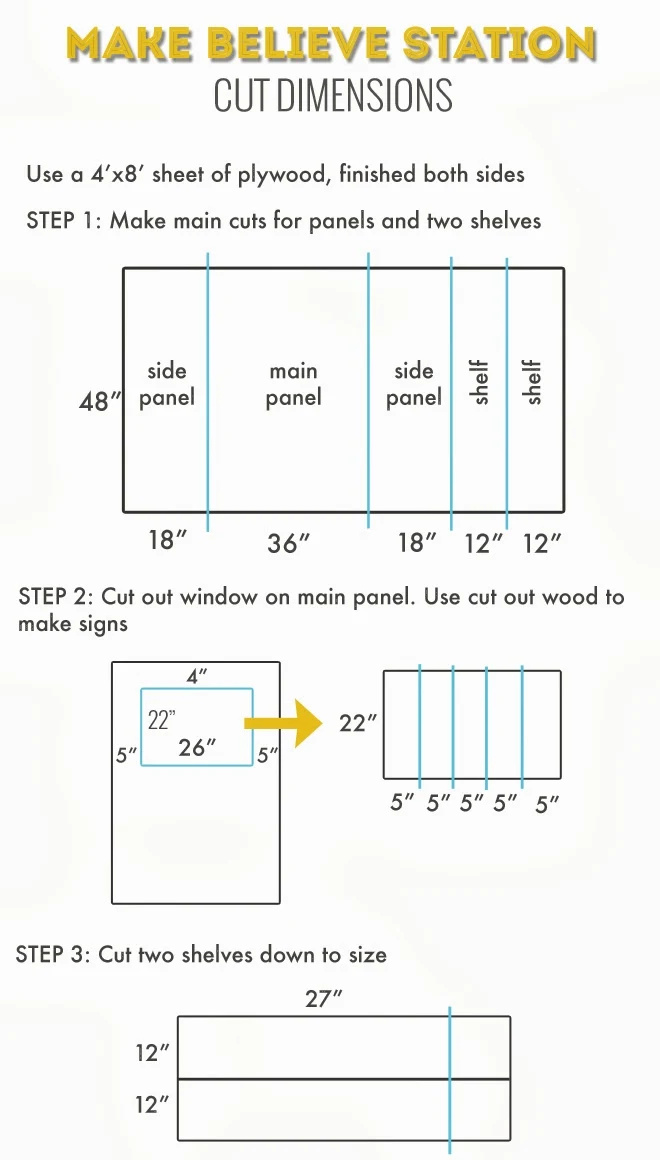
- Cut plywood as shown
- Sand all sides and edges
- Paint all the pieces
- Screw the folding shelf brackets into the underside of the two shelves. Attach the bottom shelf to the main panel, ensuring you have enough clearance for the shelf to fold down and not hit the ground. Attach the top shelf to the main panel. It will 'overlap' the bottom shelf.
- To create the pegboard:
- Draw a rectangle on the side panel approx. 15"x36".
- Cut and glue the D4S pine trim to fit the inside perimeter of this rectangle. This will act as a "spacer" so that your hooks have room when you put them on the pegboard
- Cut the pegboard to 15"x36". Sit the pegboard on top of the D4S trim. Nail the pegboard to the trim.
- Cut the outside corner trim so that it covers all four edges of the pegboard. Glue the trim in place to give the pegboard a finished look
- To create the chalkboard:
- Draw a rectangle on the side panel approx. 13.5"x22.5"
- Paint the rectangle with two coats of chalkboard paint
- Glue the classic moulding panel around the chalkboard
- Attach side panels to main panel with hinges. Attach hinges on the back of the panels so that the sides fold forward and provide stability
- Optional: Add additional trim around the main panel opening. Add painted details - you could paint scallops, bricks etc to make the station as boyish or girly as you like.
- Enjoy hours of fun :)
Click HERE to see this toy decorated as a bake shop and grocery store as well!


0 comments